Setting Up a DMVCheck Account
This document describes DMVCheck and will guide you through the process for setting up a new DMVCheck account and purchasing DMVCheck credits.
For a tutorial on how to use DMVCheck on IDentiFake, please see this article.
DMVCheck Overview
DMVCheck is a subscription service that cross-checks Driver Licenses, Driving Permits and Identification Cards issued by U.S. Jurisdictions against the DMV database. It provides you with the real-time capability to verify ID information against data from the issuing agency by verifying that the ID exists and returning true/false for ID attributes.
In order to use DMVCheck, you must have an Account and Subscription and purchase DMVCheck credits, as needed.
Account Registration
To begin, go to: https://account.tokenworks.net/
You will be required to create an account in order to gain access to the DMV Check Subscription Portal.

Upon selecting the "Sign Up" option, you will encounter the following screen.
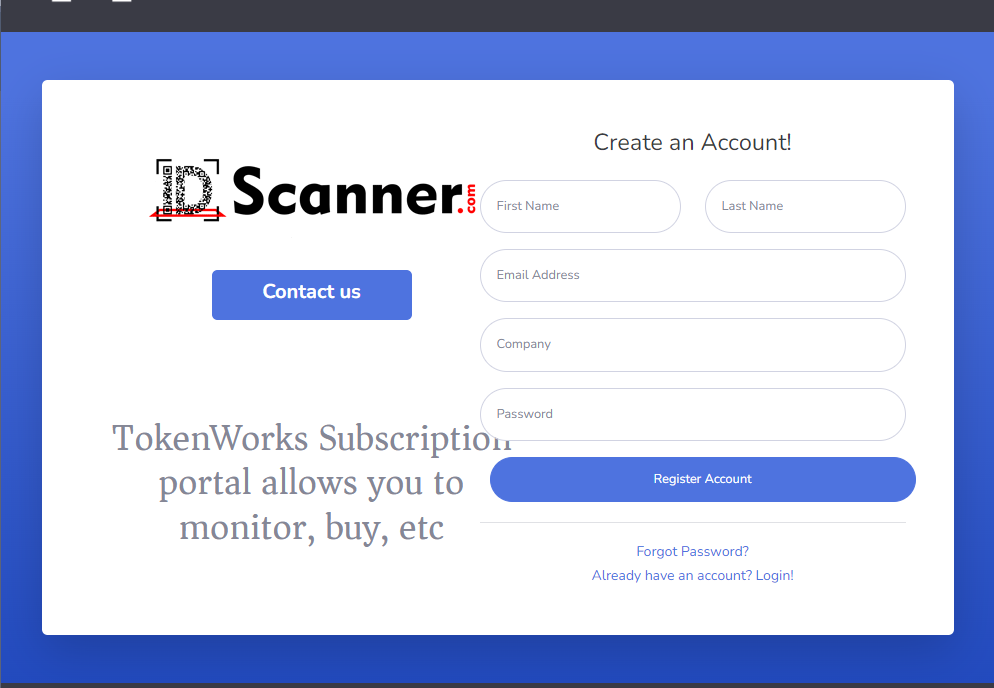
Kindly provide your details to initiate the account setup process and register your account.
Setting Up Payment Option
After registering, return to https://account.tokenworks.net/ and select "Log In".
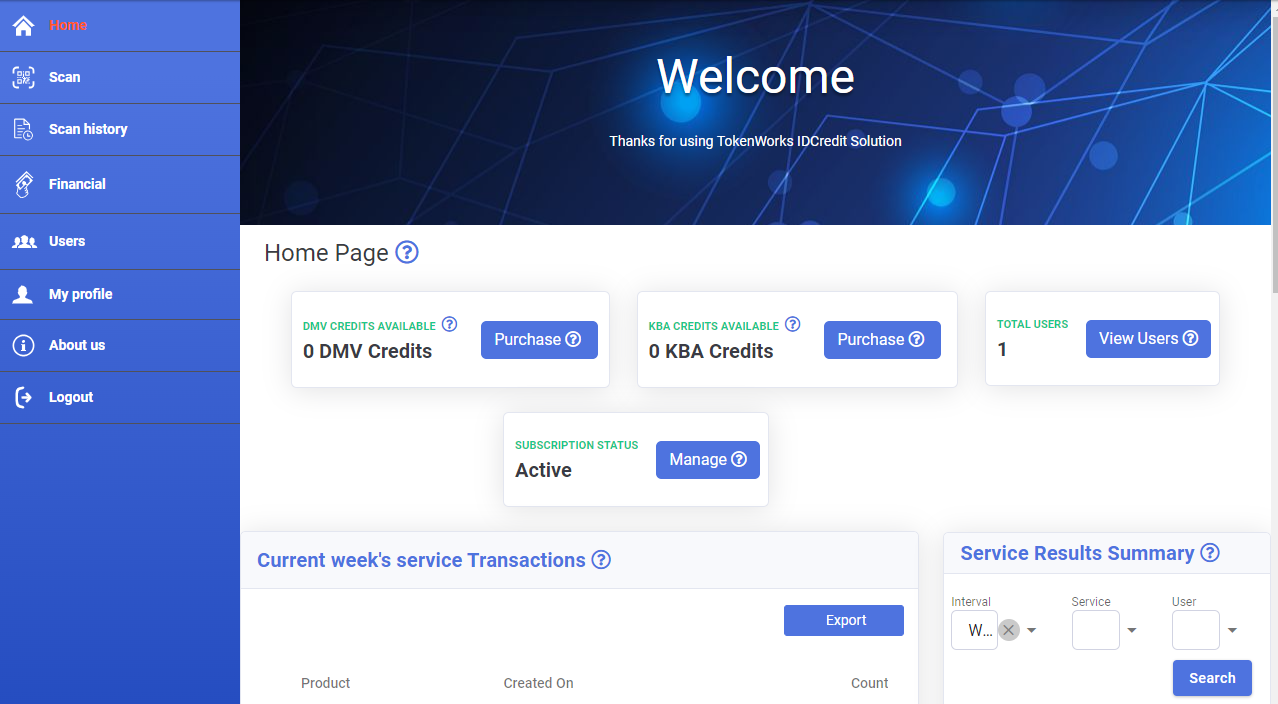
Upon entering your login credentials, you will be brought to the Account Homepage.
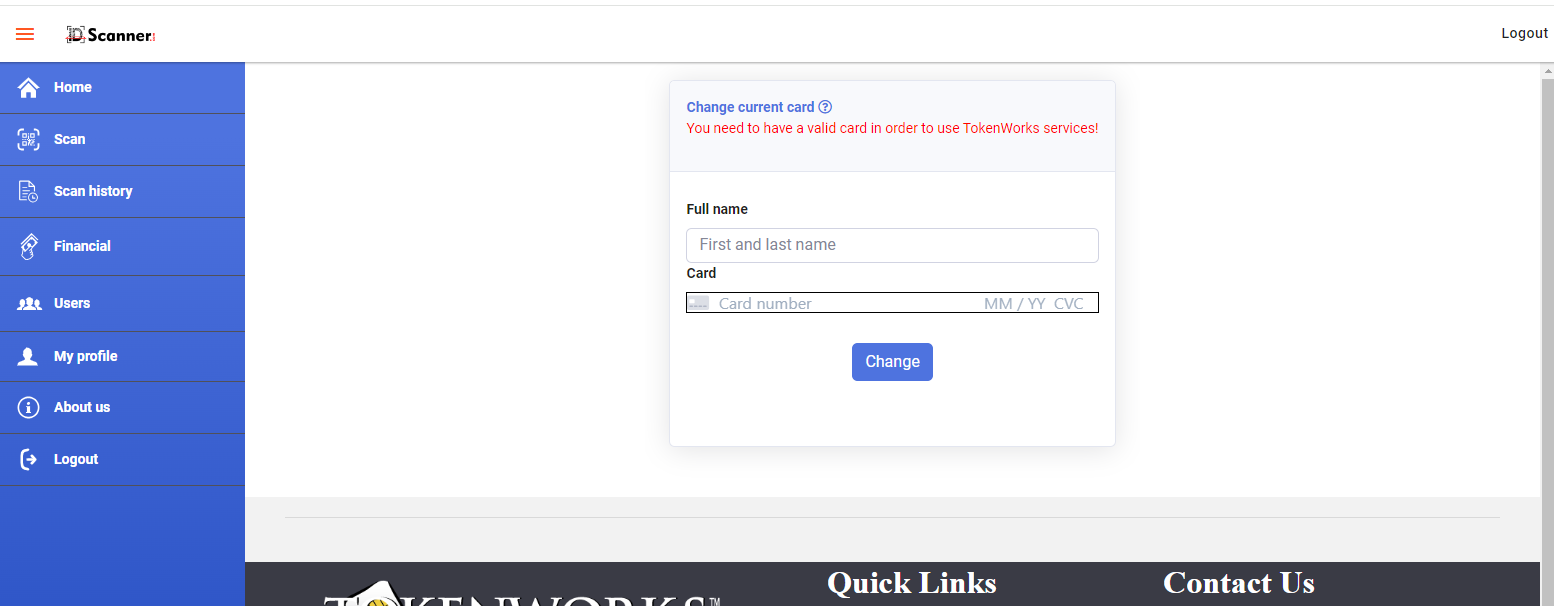
The next step is to register a credit card on the account. This credit card will be associated with your subscription to our DMVCheck program.
After completing the credit card linkage process,, you will be re-directed to the Homepage where you can view your DMV Check credit balance and obtain a comprehensive overview of your account.
Purchasing DMVCheck Credits
To purchase additional DMVCheck credits, click the "Purchase" button on the DMV Credit section of the account homepage.
You will then be met with a dropdown menu with various quantities of DMVCheck credits that can be purchased.
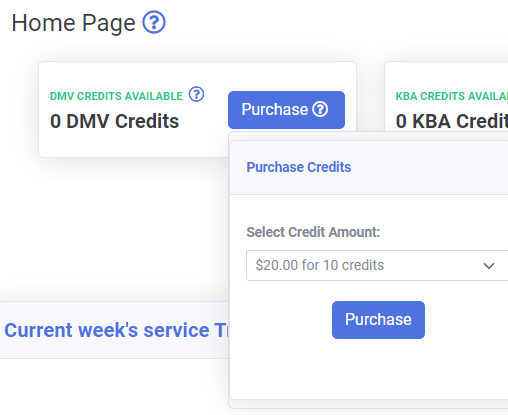
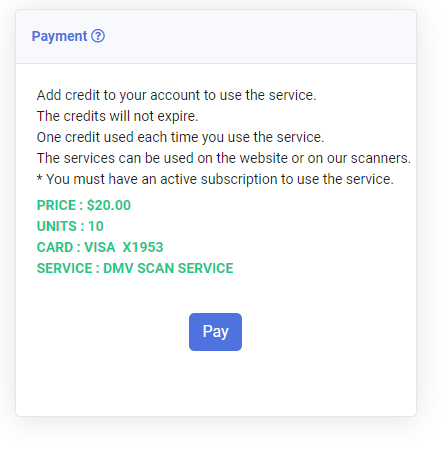
After selecting the desired amount of credits to purchase, the popup shown below will appear to confirm the purchase details.
Click the "Pay" button to complete the purchase.
1 credit is utilized whenever you perform a DMVCheck on a scanned ID.
It's important to note that these credits do not have an expiration date and will remain in your account until either the termination of your account or until they are utilized for checks.
Adding User Accounts
You have the option to create separate user accounts for any staff that will be operating the IDentiFake system and can set DMVCheck usage limits for each user account, as desired, to prevent over usage. You can also monitor each user account's credit usage from the "Users" tab.
To create a new user account, navigate to the "Users" tab from the left menu of account.tokenworks.net.
Under the "Manage Users" section you will see the master account and any other activated users.
Scroll down to the "Invite User" section to invite a new user to your master account.
Enter the contact information and press the "Invite" button
The email address that was submitted on the form will shortly receive an email prompting them to click a link to confirm their account.
The link will direct them to a webpage with the following form where they can enter and confirm their new password:
After entering their password they can log in by clicking the link below the confirmation or going to account.tokenworks.net
After they've confirmed their account, the new user account will show up under the "Manage Users" section
Setting Usage Limits
To set DMVCheck credit usage limits for a specific user, navigate to the "Users" tab, then click the  (gear icon) corresponding to the desired user account.
This will then display the following "Units Managment" pop up:
Click the "+" icon (highlighted in red above) to create a new credit usage limit for the selected user account.
On the next screen select the desired product ("DMV Scan Service") and enter the desired credit usage limits in the fields below, then click save.
The new limit will then be displayed
Viewing DMVCheck Scan History
To view your DMVCheck scan history, from the account homepage, click the "Scan History" menu tab (highlighted in red below).
You can then filter for a desired date range as well as export the scan history using the "Export" button
Related Articles
Setting Up a DMVCheck Account
This document describes DMVCheck and will guide you through the process for setting up a new DMVCheck account and purchasing DMVCheck credits. For a tutorial on how to use DMVCheck on IDentiFake, please see this article. DMVCheck Overview DMVCheck is ...How to Use DMVCheck on IDentiFake
This article will provide a tutorial on how to use DMVCheck on IDentiFake and assumes that you already have an existing DMVCheck subscription. For a guide on setting up a subscription, please see this article. DMVCheck Overview DMVCheck service ...How to Use DMVCheck on IDentiFake
This article will provide a tutorial on how to use DMVCheck on IDentiFake and assumes that you already have an existing DMVCheck subscription. For a guide on setting up a subscription, please see this article. DMVCheck Overview DMVCheck service ...IDentiFake Training Tutorial - Scan Results
IDentiFake Tutorial How to Interpret Scan Results Introduction The purpose of this document is to detail how the IDentiFake system works, and most importantly, how to interpret/respond to the scan results. Introduction Welcome to Your ID Security ...How to Create a Google Account on an IDVisor Smart, Smart V2, and Smart Plus
Creating a Google Account on an IDVisor Smart, Smart V2, and Smart Plus A Google account will be needed on the device if you would like to use features such as wireless exporting sending extracted customer data via gmail, and/or if you would like to ...