AgeVisor Touch Does Not Power Up
If your AgeVisor Touch does not power up or is having any power issues please try these troubleshooting steps to address the issue:
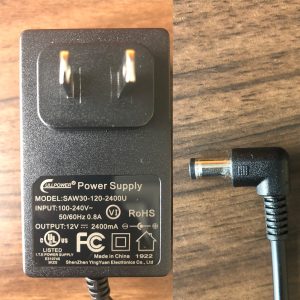
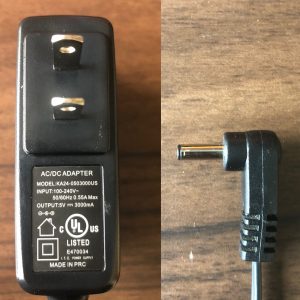
Note: Before beginning the troubleshooting steps please determine if your AgeVisor Touch is using a 12V or 5V power supply by viewing the images below.
12V DC 2.4 Amp 5.5mm x 2.5mm Center Positive Plug
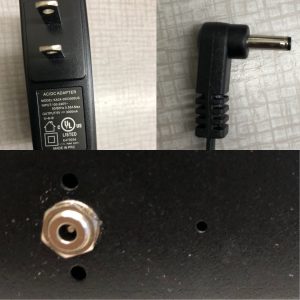
5V DC 3 Amp 3.5mm x 1.35mm Plug Center Positive
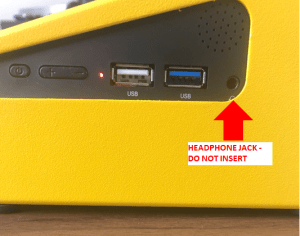
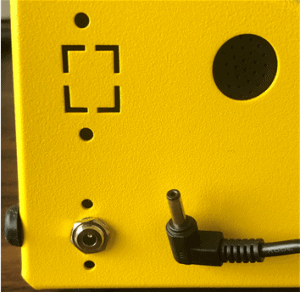
1. Make sure the power cord is completely inserted into the power jack located on the left side of the unit. The power jacks will be different depending on if you have a 12V or 5V model of the AgeVisor Touch (see above pictures to determine if AgeVisor Touch is 12V or 5V model).
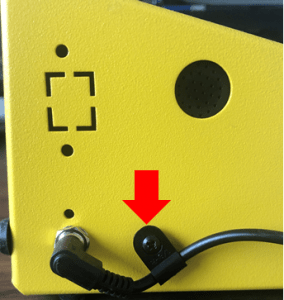
5V AgeVisor Touch model.
NOTE: Starting in January 2019, the 5V AgeVisor Touch model power supply is now screwed in to the side of the unit using a cable clamp to prevent any loose connection.
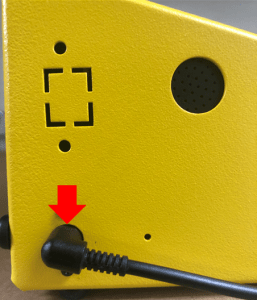
12V AgeVisor Touch model.
If you have lost or damaged you AgeVisor Touch see here for replacement power supplies we’ve ordered and tested from Amazon.
12V DC 2.4 Amp 5.5mm x 2.5mm Center Positive Plug
5V DC 3 Amp 3.5mm x 1.35mm Plug Center Positive
4. Power cycle the AgeVisor Touch. Follows the steps below to power cycle your AgeVisor Touch. These steps will work for the 12V and 5V models of the AgeVisor Touch.
5V AgeVisor Touch model used to demonstrate steps below.
Step 1: Unplug the power cord from the power jack. Leave the unit unplugged for 15 seconds.
NOTE: Starting in January 2019, the 5V AgeVisor Touch model power supply is now screwed in to the side of the unit using a cable clamp to prevent any loose connection. Skip Step 1 if your power supply is connected to the power jack in the same way shown in the picture to your left.
Step 2: After 15 seconds of leaving the unit unplugged, re-insert the power cord.
After 2-3 minutes the AgeVisor Touch should boot up to the Main screen of the software.
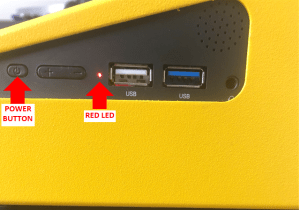
If the Red LED light turns on but the AgeVisor Touch boots to a black screen please scroll to the bottom of the page and open a support ticket to request a RMA.
If after trying these troubleshooting steps you are still unable to power up your AgeVisor Touch. Please create a support ticket providing your Name, Company Name, Phone Number, and Email Address here. Customer support will contact you with further instructions as soon as possible.
Related Articles
Agevisor Touch and Contactless Unresponsive Touch Screen
If your Agevisor Touch or Contactless screen becomes unresponsive to touch, please follow the steps below on how to correct the issue. Power Cycle Device Connect a USB Mouse and or USB Keyboard into the USB ports on the right side of the unit. Once ...Power Supply – AgeVisor Touch
Power Supply – AgeVisor Touch Replacement AgeVisor Touch Power Supply Lost or Damaged your AgeVisor Touch Power Supply? This post details the two power supplies used on the Age Visor Touch, how to tell them apart and Amazon links to buy replacements. ...AgeVisor 3 Will Not Power On or Take a Charge
AgeVisor 3 Will Not Power On or Take a Charge How do I know if my AgeVisor 3 is receiving a charge? AgeVisor 3 charging status 1. At the top of the screen there will be a battery and lightning bolt charging symbol to indicate the AgeVisor 3 is ...Stuck on Getting Windows ready or Windows logo screen - AgeVisor Touch, AgeVisor 2, AgeVisor Contactless
Stuck on Getting Windows ready or Windows logo screen - AgeVisor Touch, AgeVisor 2, AgeVisor Contactless If your AgeVisor device is stuck on a Getting Windows Ready screen or the Windows logo with a loading circle, your device is most likely going ...How to fix a broken update on AgeVisor Touch, AgeVisor, IDWedgePro, IDVisor Sentry
How to fix a broken update on AgeVisor Touch, AgeVisor, IDWedgePro, IDVisor Sentry Last modified: October 9, 2019 at 10:17 am by Justin Problems with automatic software updates (message box indicating a problem with the update) If your Tokenworks ...


